Before diving into the nuts and bolts of panel replacement, it helps to understand why and when you might need to swap out your solar modules.
Whether you’re preparing for a roof upgrade or simply seeing less electricity than you once did, this guide will walk you through every step—from spotting red flags to choosing your next set of panels—so you can save money, maintain full sun performance, and keep the sunshine on your side.
Why & When to Replace Solar Panels
Solar panels are designed for the long haul, but even the best modules have limits. Most solar panels come with 20–25-year warranties, while the U.S. Department of Energy estimates they can continue operating for 30–35 years or more at reduced efficiency.
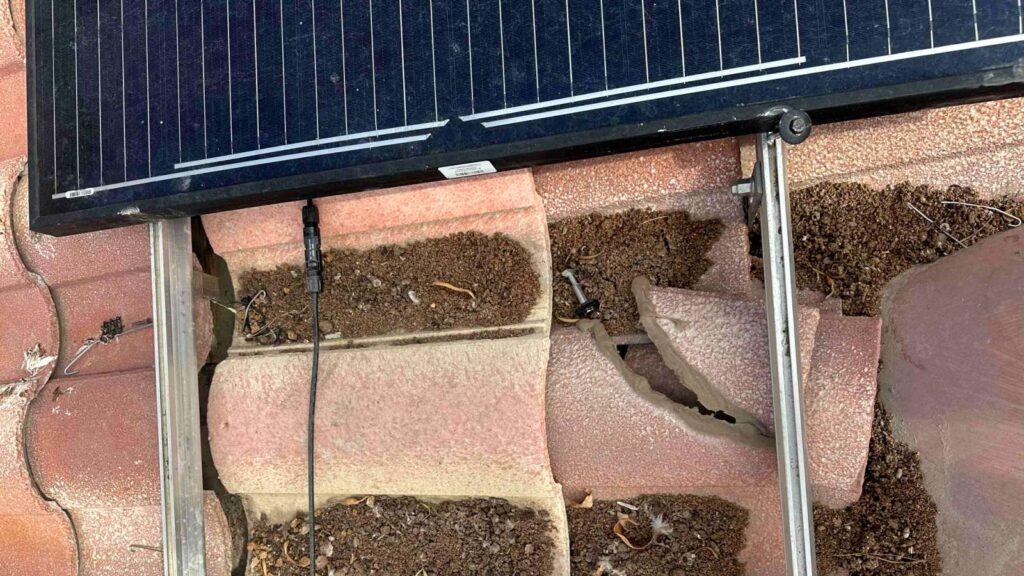
Severe Weather or Physical Damage
Hail, wind, and debris can crack glass or loosen mounts.
Roof Work or Re-Roofing
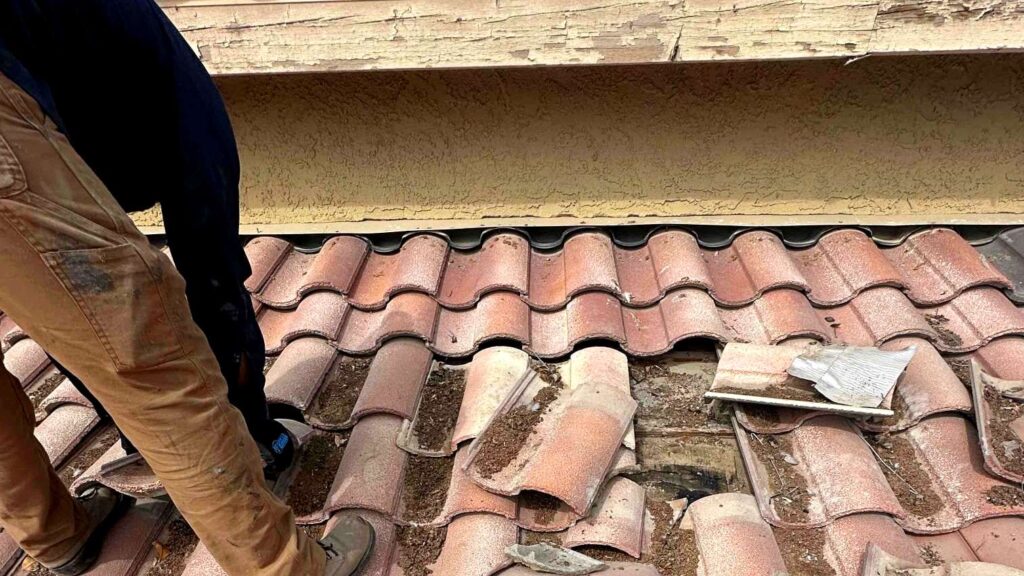
Panels often must be removed to repair or replace roofing materials safely.
End of Efficiency Warranty
When production dips below warranty thresholds—typically 90% at 10 years and 80% at 25 years—you may qualify for free replacement under many manufacturer policies.
Key “Red Flags”
- Cracks or Hotspots on panel surfaces
- Rapid Output Loss beyond the typical 0.5–0.75% annual degradation
- Delamination or corrosion around module edges
Spotting problems early gives you the lead time to plan your project rather than scramble when energy needs spike.
| Sign or Condition | Repairable? | Often Leads to Replacement? |
|---|---|---|
| Cracked panel glass | Sometimes | Yes |
| Yellowing or delamination | No | Yes |
| Output has dropped >20% | No | Yes |
| Mounts corroded or loose | Yes | Not always |
| Roof under panel is damaged | No | Often |
Nevada Solar Permitting & Interconnection

Navigating local regulations is a key factor for a cost-effective replacement:
- Permit Requirements: In Las Vegas and Clark County, you must pull a building permit before you remove or install solar panels on your roof.
- Interconnection Process: NV Energy requires an application to connect your solar energy system to the grid. This involves submitting technical specs—like direct current (DC) and alternating current (AC) ratings—so they can approve your interconnection agreement.
- Typical Prices & Fees: Permit and inspection fees generally range from $100–$300, depending on the scope of work and whether you add additional panels to an existing array.
For a smoother approval, your solar contractor should handle the paperwork—so you can focus on daylighting the outdoors, not chasing paperwork.
Las Vegas Climate Considerations
The Mojave Desert brings unique challenges—and advantages—to your solar system:
Extreme Heat & Efficiency
- Temperature Coefficient: High desert heat can reduce panel output. Look for modules with a low temperature coefficient (e.g., –0.3%/°C vs. –0.5%/°C) to keep as much of your originally produced power as possible.
- Heat-Mitigation Solutions: Install solar panels with raised mounting to allow airflow underneath, or choose bifacial panels that can reflect heat off the roof.
Dust & Soiling
- Desert Dust: Fine particles settle on your modules, cutting full sun performance.
- Mitigation Strategies:
- Regular Washing Kits: Use an outdoor-cleaning kit or pump-fed brush system once a month.
- Protective Coatings: Apply anti-soiling sprays that reduce dust adhesion.
Seasonal Variations
- Winter Gains: Lower temperatures in winter can boost panel efficiency, even though days are shorter.
- Monsoon Rains: Occasional summer rains naturally wash away dust—plan your maintenance around these cycles to maximize savings on cleaning.
Las Vegas Solar Production Data
Our analysis of NREL data shows how Las Vegas solar production varies throughout the year:
| Month | Solar Radiation (kWh/m²/day) |
Monthly Production (5kW system) |
Daily Average Production |
Typical Dust/Soiling Impact |
|---|---|---|---|---|
| January | 4.43 | 558 kWh | 18.0 kWh/day | Low (5-10%) |
| April | 7.42 | 854 kWh | 28.5 kWh/day | Medium (15-20%) |
| July | 7.36 | 809 kWh | 26.1 kWh/day* | High (20-40%) |
| October | 6.02 | 711 kWh | 22.9 kWh/day | Medium (10-15%) |
*July production is lower than May/June despite high solar radiation due to heat-related efficiency loss
Source: Data from National Renewable Energy Laboratory (NREL) PVWatts Calculator for Las Vegas, Nevada. System specifications: 5kW DC system, 20° tilt angle, south-facing fixed array.
Signs of Degradation & Damage

Over decades, panels gradually lose output. According to the Pennsylvania Public Utility Commission, PV systems degrade at about 0.5% per year, so a 25-year-old array might produce 85–90% of its original capacity.
Visual Cues
- Discoloration: Browning or yellowing in the encapsulant
- Micro-Cracks: Fine fissures in cells that interrupt current flow
- Delamination: Peeling layers that allow moisture ingress
Performance Testing
- Infrared (IR) Imaging: Identifies hotspots and wiring faults
- I–V Curve Analysis: Measures current-voltage behavior to assess overall health
Regular inspections—ideally annually—help you decide whether to repair minor issues or proceed with full panel replacement.
Replacement Process Overview
Swapping out panels involves three main phases:
Inspection & Assessment
- Site Survey: Evaluate roof condition, shading, and array layout
- Performance Audit: Use I-V tests and production data to pinpoint underperformers
Removal
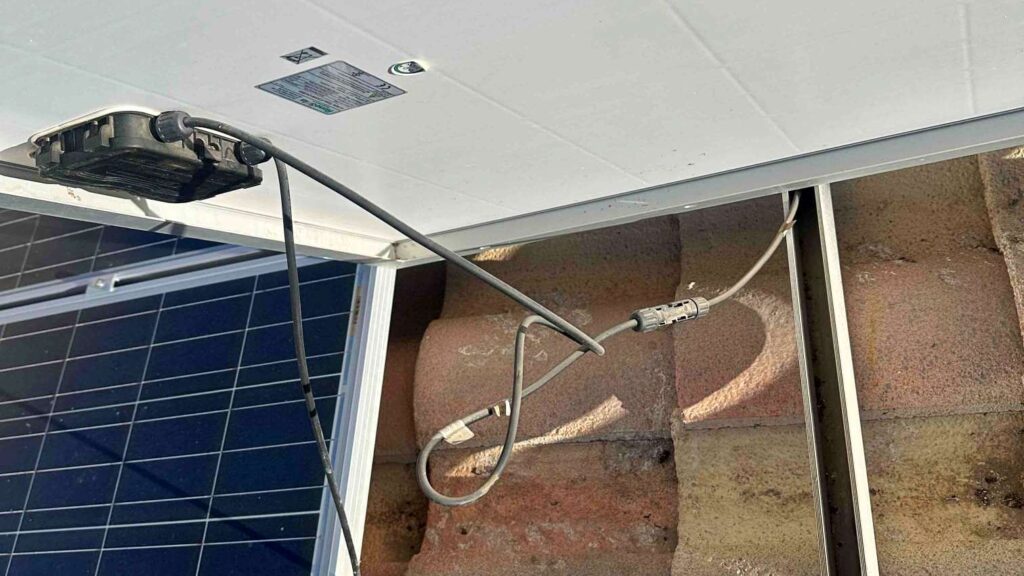
- De-energize Safely: Shut down and unclip modules
- Protect Hardware: Keep racking and wiring intact whenever possible to reduce costs
Reinstallation
- Reuse vs. Replace: Decide if mounts and inverters can be salvaged or need upgrading
- System Commissioning: Verify DC to AC conversion and grid connectivity
Most re-installs happen within two weeks of roof work, minimizing downtime and disruption to your daily energy flow.
Cost Breakdown
Budget wisely by understanding where your dollars go:
- Panel Removal & Reinstall: $275–$300 per panel on average
- Roof Prep vs. Full Re-Roof: Patching costs far less than complete reroofing
- Warranty Coverage: Many solar panels include a 25-year output guarantee—see the Solar.SC.gov guide on solar panel warranties and maintenance for details.
- Money-Saving Tips:
- Bulk Replacements: Lower labor costs per module
- Component Reuse: Salvage usable inverters, wiring, and mounts
- Manufacturer Rebates: Ask about special offers or bundled services
Pro Tip: Combining roofing and panel work can unlock package discounts from your installer.
DIY vs. Hiring a Pro

While a DIY mindset is an appealing solution, solar panel work carries risks:
DIY Risks
- Voided Warranties: Improper handling can nullify coverage
- Safety Hazards: High-voltage modules can injure untrained hands
- Performance Issues: Incorrect wiring reduces system efficiency
Professional Advantages
- Structural Safety: Proper roof anchoring and load distribution
- Permitting & Insurance: Handling local codes and liability
- Warranty Preservation: Following manufacturer protocols
How to Vet Installers
- Check NABCEP certifications
- Read customer reviews on Google or Yelp
- View in-field references or recent job photos
Choosing Replacement Panels
Deciding between matching your existing array or upgrading depends on your goals:
Matching vs. Upgrading
- Match Old System: Ensures uniform appearance and simplifies installation
- Upgrade: Achieve higher wattage per panel or add extra modules
Key Specifications
- Power Rating: Wattage output per module
- Degradation Warranty: Look for 90% at 10 years, 80% at 25 years
- Temperature Coefficient: Lower values mean less performance loss in heat
Top Manufacturers & Models
- Tier-1 Brands: Often backed by robust warranties and strong reviews
- Enphase-Compatible Panels: Simplify integration if you use microinverters
Post-Replacement Care & Maintenance
New panels still need TLC to deliver maximum power:
- Routine Cleaning: Dust in Las Vegas can cut output by up to 40% if left unchecked.
- Visual Inspections: Check for loose wiring, debris, or corrosion
- Performance Monitoring: Track daily yields to catch dips early
- Follow the National Renewable Energy Laboratory’s best practices for PV system maintenance to extend your array’s usable life.
Troubleshooting Common Issues
Even fresh installations can face hiccups:
- Shading or Debris: Nearby trees or dirt can block full sun performance
- Inverter Faults: Often resolved by a professional reset or firmware update
- Module Mismatch: Mixing panel vintages leads to uneven output
Prevent minor faults from turning into major headaches by staying proactive.
Safety Precautions
Ensure a smooth replacement by planning for the unexpected:
- Proper Storage: Keep panels flat and shaded to avoid accidental damage
- Budgeting for Surprises: Roofers may uncover hidden rot once panels are off
- Cleaning Protocols: Follow the Department of Energy’s solar PV cleaning guidelines to prevent soiling and wildfire risks.
- Reliable Partner: A clear project plan from a trusted company minimizes risks
Your Replacement Solar Panels Checklist
-
1Inspect current panels and review production data
-
2Gather Quotes from at least three certified installers
-
3Schedule Roof Work alongside panel removal to save time
-
4Select Panels with solid warranties and performance specs
-
5Plan Downtime for removal and reinstallation
-
6Set Up routine cleaning and performance tracking
Power Up Your Savings Today
Replacing solar panels is an investment that pays off through improved efficiency, extended system life, and ongoing energy savings. Ready to take the next step?
Contact Bob’s Repair for a free, no-obligation quote and expert service tailored to Las Vegas conditions.
Harness the full potential of your solar energy system—because every ray counts.
